Welcome to the home of...

Tailgate Theft Prevention
Gate Keeper®
|
|---|
Gate Keeper® Installation
This tutorial covers the installation of our Gate Keeper® P/N
200750
Unfortunately, we have discontined this model due to increasing material costs and vendor issues.
This page remains for reference.
Tools Required:
Metric socket set or 10mm wrench
Installation/removal tool (provided with Gate Keeper® kit.)
Thread lock adhesive (suggested)
Time Required to install:
About 10 minutes
See a 1 minute installation video on this part done
on a 2016 F150. (Others similar).
Scroll down to see picture tutorial or view the video tutorial (1 min.)
Note: Video is on a Ford F150 truck but the installation procedure is very similar for F250, F350, F450 etc.
PN 200750 Ford Trucks 2015 - 2022 F150 |
Notice: The Gate Keeper® is NOT a lock and will not protect valuables left in the bed of the truck. The Gate Keeper® is strictly a theft deterrent to help protect your tailgate from theft. Redline Technical Group, Inc. makes no warranties, written or implied, that the Gate Keeper®will protect your vehicle or your personal property from theft or vandalism.
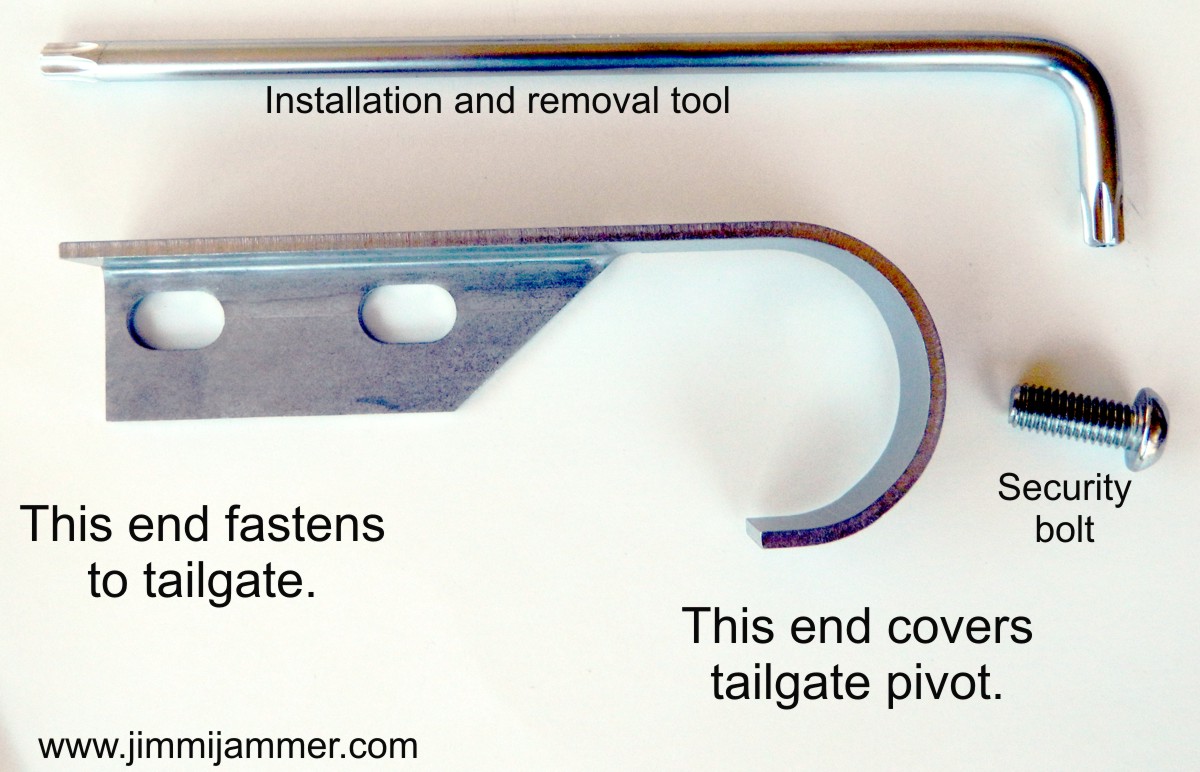
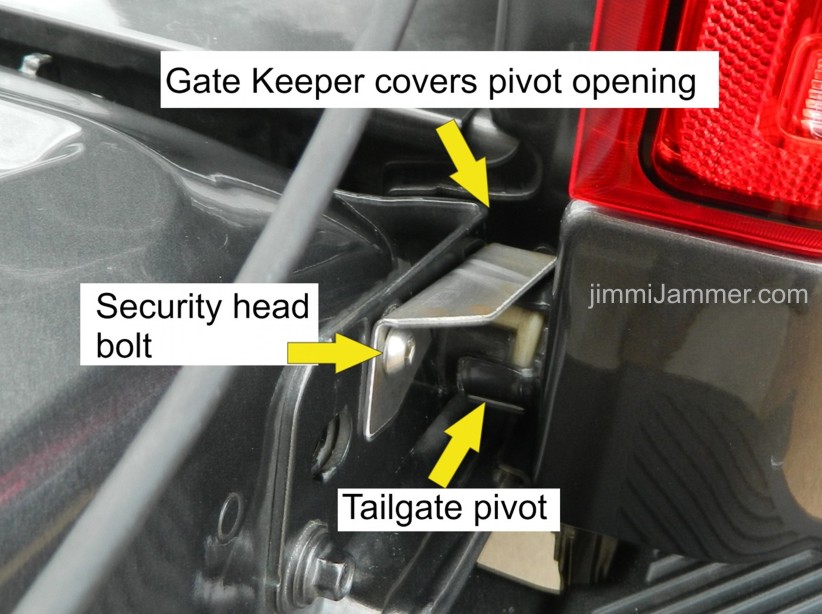
1. The tailgate pivots along the bottom edge. On the right side, there is a slot in the pivot joint which allows the gate to be lifted off the truck without any special tools. This is the area that the Gate Keeper® guards. |
 |
|
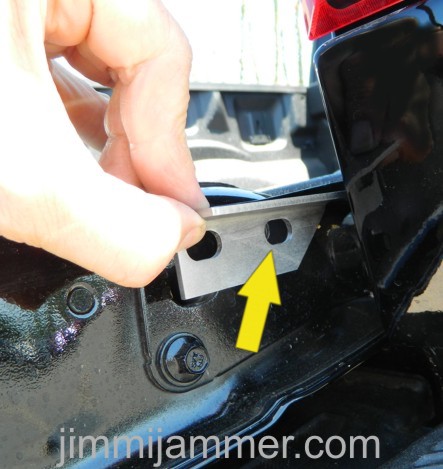
2. Two mounting slots are provided on the Gate Keeper® bracket. Use the slot appropriate to your vehicle. |
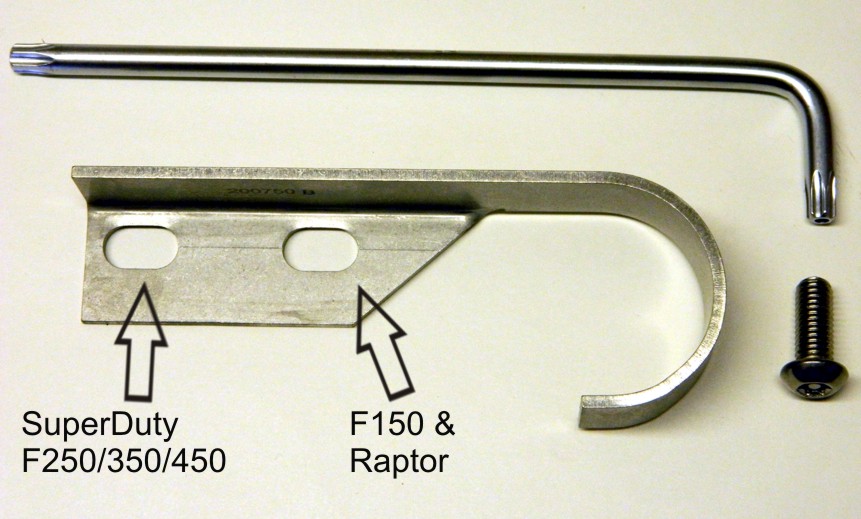 |
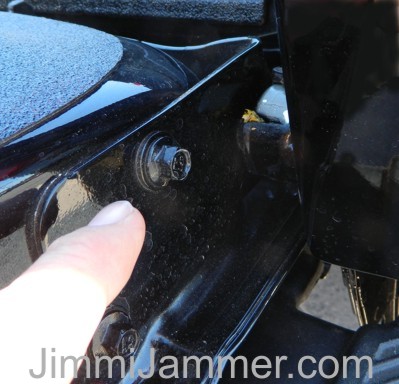
3. Two bolts attach the pivot assembly to the tailgate. The Gate Keeper® bracket will mount using the bolt hole nearest the inside surface of the tailgate.
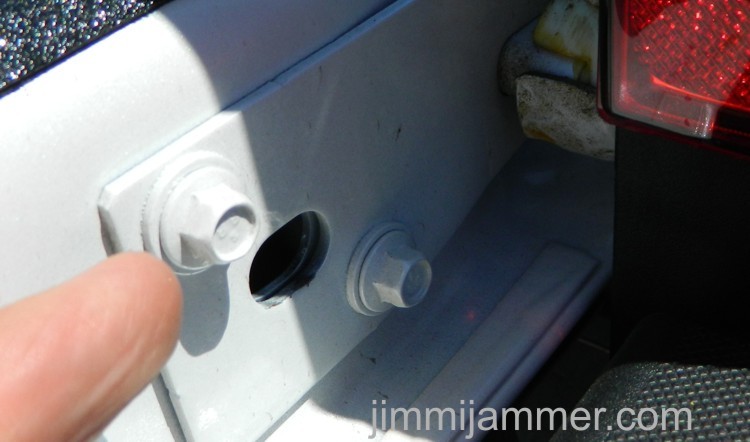
The top photo to the right (black vehicle) shows the bolt to remove on an F150 or Raptor truck. The bottom photo to the right (white vehicle) shows the bolt to remove on the F250, F350, F450 etc. Super Duty trucks.
|
F250, F350, F450 etc. bolt location v |
| 4. Remove the top bolt from the tailgate. |  |
| 5. Apply a drop of thread adhesive to the security head bolt from the Gate Keeper® kit. |  |
| 6. Place the hooked end of the Gate Keeper® bracket over the pivot point where the tailgate and truck bed are joined. | 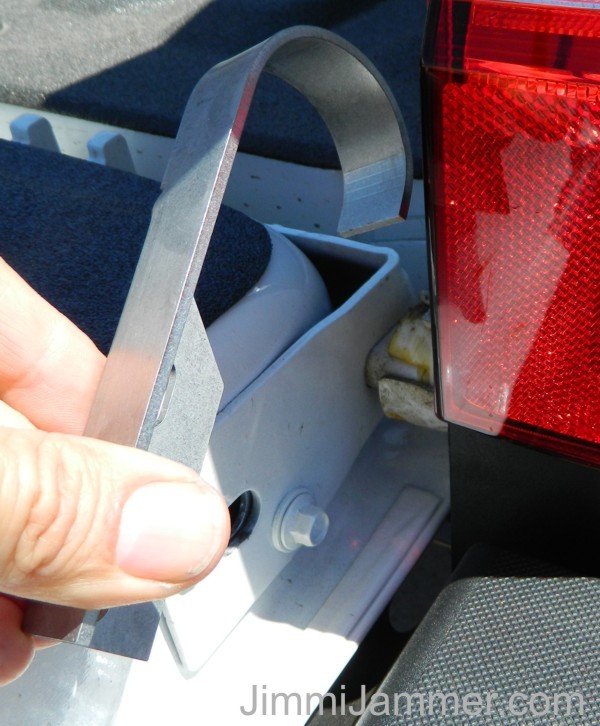 |
|
7. Move the Gate Keeper® bracket into place so that the apporpriate mounting slot aligns with the bolt hole. (F150 Raptor shown). For F250/350/450 trucks, the rear mounting slot will be used. Thread the security head bolt into the hole and tighten using the provided tool. Once in place, test the gate up and down to make sure there is no interference.
|
 |
This photo shows the installation completed. Now, put the installation/removal tool somewhere safe in cas you ever need to remove the gate. All done! |
 |
Back to installation tutorial list Ready to buy? See our dealer list or contact us. Questions? Visit our Gate Keeper® FAQs page. |
 All photos, descriptions and images copyright Redline Technical Group, Inc. © |
| Disclaimer: Every effort is made to accurately portray the installation process for each model. However, if you are not certain of your abilities, we recommend having one of our authorized dealers perform the installation for you. |